

That frustrating feeling when you post a link on Facebook or Twitter and it shows a thumbnail of an image that has nothing to do with what you are posting.
Grrrrr. 🤬
And it feels like there is absolutely nothing you can do to change it or make it go away.
I feel you.
I felt that frustration too. We all know that images can speak louder than words, so if the image is irrelevant, then why would anyone bother reading the text right?
Well my friends, I have the answer. And it’s a pretty easy fix too!
Step 1
You need the Yoast! Plugin*. They have a free and a paid version, but the free one is all you need for this fix.
(*Yoast! is a plugin for self-hosted WordPress websites.)
https://yoast.com/wordpress/plugins/seo/
You can grab a download of Yoast! here or simply type Yoast! SEO into the plugin search bar in the backend of your WordPress website.
Step 2
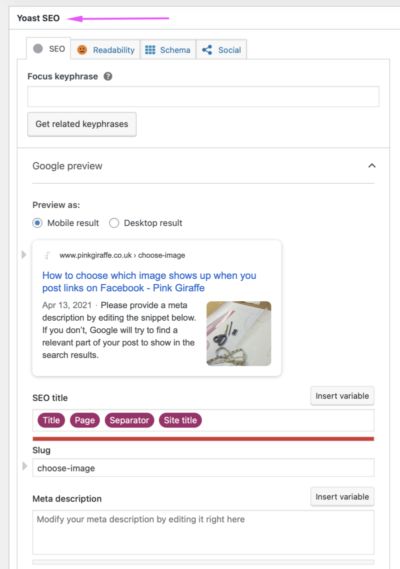
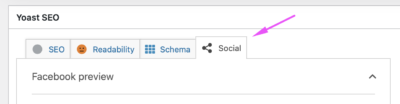
When editing a new page or post on your website, scroll down to the Yoast SEO Box and click on the Social tab.
Step 3
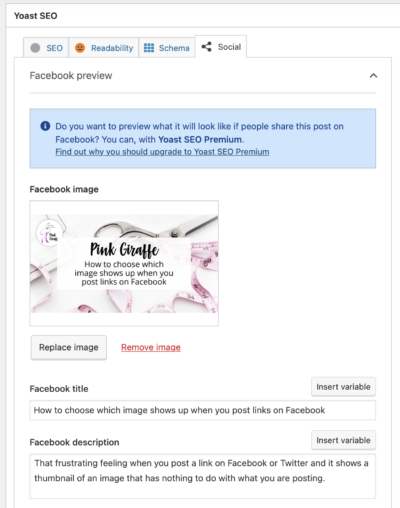
Choose the image you want to use for this webpage. The ideal image size is 1200 x 630 px. I have a template in Canva that I use to create mine. Complete the text boxes for ‘Facebook Title’ and ‘Facebook Description’.
Step 4
Scroll down and copy the image and text into the Twitter boxes. It’s worth doing this even if you don’t use Twitter because it will work if anyone else shares your link on there too.
Step 5
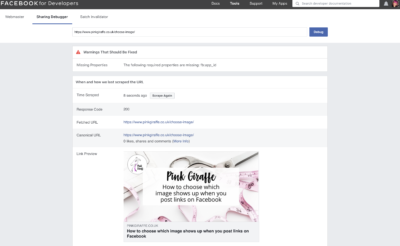
Check it has updated by using the Debug tool. If it hasn't updated yet you can use this tool to 'fetch' the new image*.
https://developers.facebook.com/tools/debug/
(*note that sometimes your browser's cache may still be clinging on to that old image, so use a different browser or private browser to check.)
NB: If you get the "The following required properties are missing: fb:app_id" warning, then don't worry. It's fine. Read this article by Yoast for more info.
Step 6
Post your link on social media knowing that it will show the image you have chosen rather than some random one that doesn't make sense.
Well done!
All complete and working fabulously.
Go you, you little web deisgner you. 😉

